6 Steps to Setting Up Goals in Google Analytics

Contents
Many people think that Google Analytics is just a tool that tells you how many people visit your website. Sure, it does do that, but it can do so much more when you set up Goals.
Think about it, how do you know when a user on your website completes an activity on your website, like making a purchase or filling out a form?
When you set up Goals in Google Analytics, you are defining the desired actions you want users to take when they are on your site.
By putting that information into Google Analytics, you are going to receive even more valuable data than you were receiving before. We are going to walk through the 6 step process of setting up a Goal in Google Analytics so that you can make the most out of your website.
About Goals and Conversions
Before jumping into the process of creating a Goal, let's talk about conversions. When you go to check how you're hitting your Goals, you will looking at the conversion data in your reports.
What's a conversion? A conversion is when a user completes an action or activity on your website.
Conversions are crucial for knowing how often users are making purchases or filling out forms on your website. Not only will you know how many conversions you've made, but with Google Analytics you will receive data such as what channels and sources are driving users to your site and converting them.
In order for conversion data to appear in your reports, you must have Goals set up.
Want to actually understand Google Analytics? Well, you can learn all the basics in just 9 days!
Sign up below to have a short video texted to you every day to learn more about Google Analytics:
6 Steps to Creating a Goal in Google Analytics
In this example, we are creating a Goal for a user filling out a form on a website. When the user fills out this form, they will be redirected to a thank you page (thank-you.html) on the website. This means that we will creating a destination goal in Google Analytics, since the desired action is for the user to end up on the thank you page.
1. Navigate to Google Analytics and sign in.
If you have a Google Analytics account, click the "Sign in to Analytics" text link. If you don't have a Google Analytics account, click the "Start for free" button to get started.

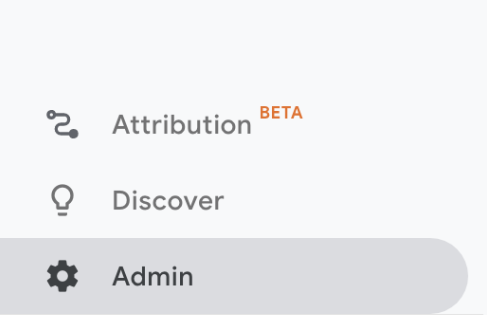
2. Go into the Admin section of Google Analytics
The Admin section is located on the bottom left side of the Analytics screen with a gear icon.
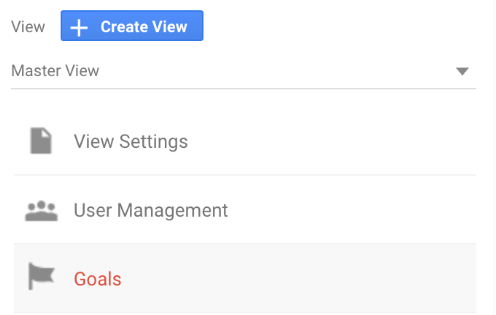
3. Navigate to the View column and click on Goals.
View is the third column in the Admin section. Click on Goals.
4. On the Goals screen, click on + NEW GOAL to create a goal.
The +NEW GOAL button is in the upper lefthand corner and will lead you to the Goal setting form.

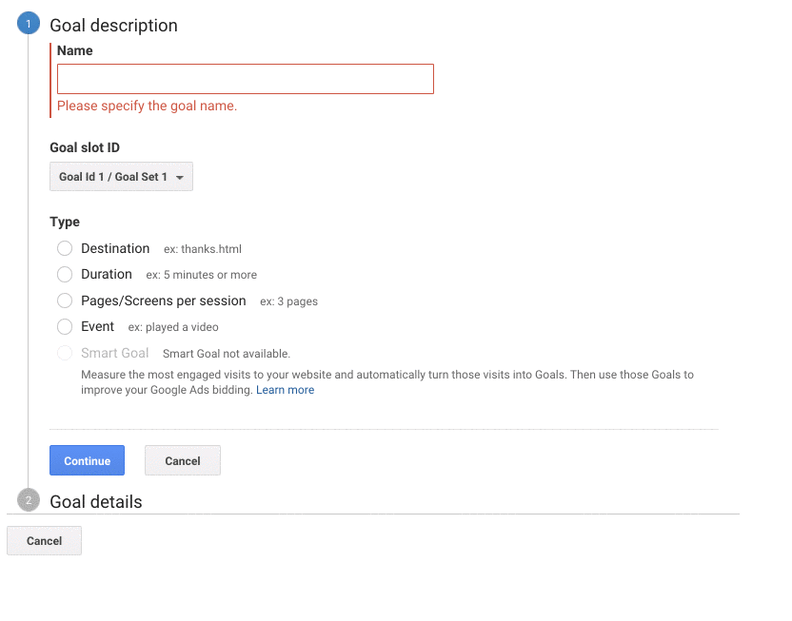
5. Fill out the details on the form for the first step of creating a Goal.
In this step, you'll need to name your goal. Be sure to keep your nomenclature clear and consistent. Since we are considering a conversion being a user landing on the thank you page, we are naming the goal "Thank You Page". Simple, right?
Next, set the Goal slot ID. In this example, we are leaving it as the default of Goal ID 1.
For the last part of this step, you'll need to select the Goal type. You can choose from Destination, Duration, Page/Screens per Session, and Event. Since our example is about a user landing on a thank you page, we are selecting Destination.
Click continue after you have filled out all of this information.
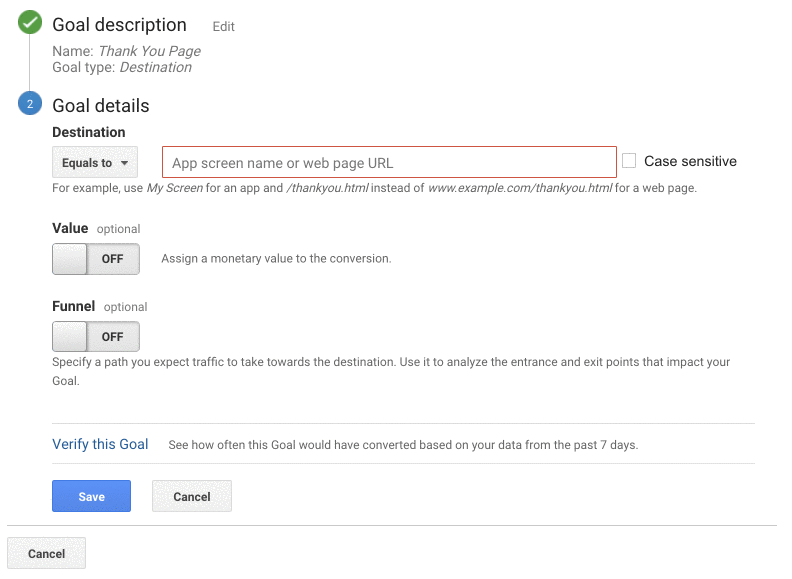
6. Fill out the details on the form for the second step of creating a Goal.
Since this is a Destination Goal, the next step in the process requires us to set the specific destination. So we will input thank-you.html which is the example thank you page.
For this example, we will leave the Value and Funnel off and the Verify This Goal text link and then click the Save button. You will be redirected back to the Goals screen and see your new Goal.
Now let's talk about what the Value and Funnels options mean for your goal.
Value Option
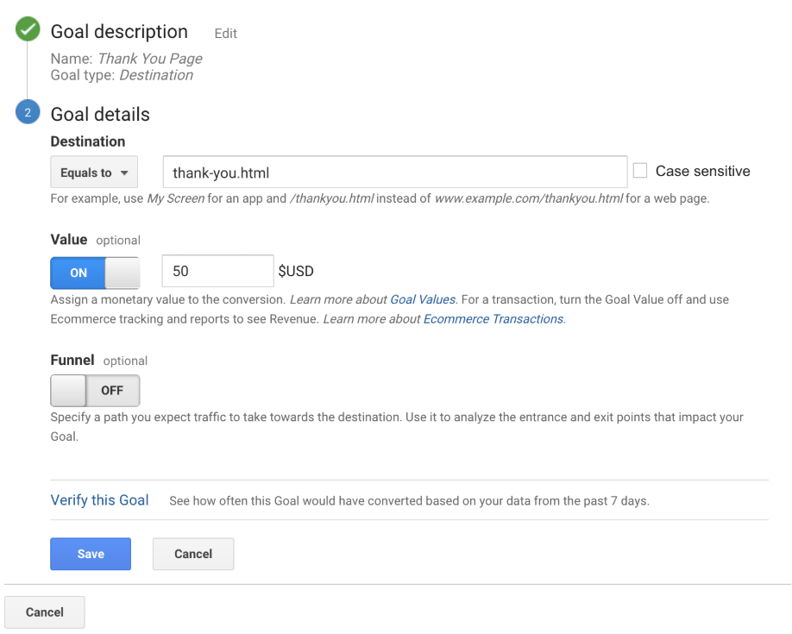
The value option is great for when you know how much money a specific Goal being completed brings in for your business.
For example, if you know that you generate $50 in revenue each time a user fills out a form, then you would enter $50 as the value.
However, some actions don't have monetary value, so it's perfectly fine to leave this option off.
Here's an example of how it would look if you have the Value option turned on:
Funnel Option
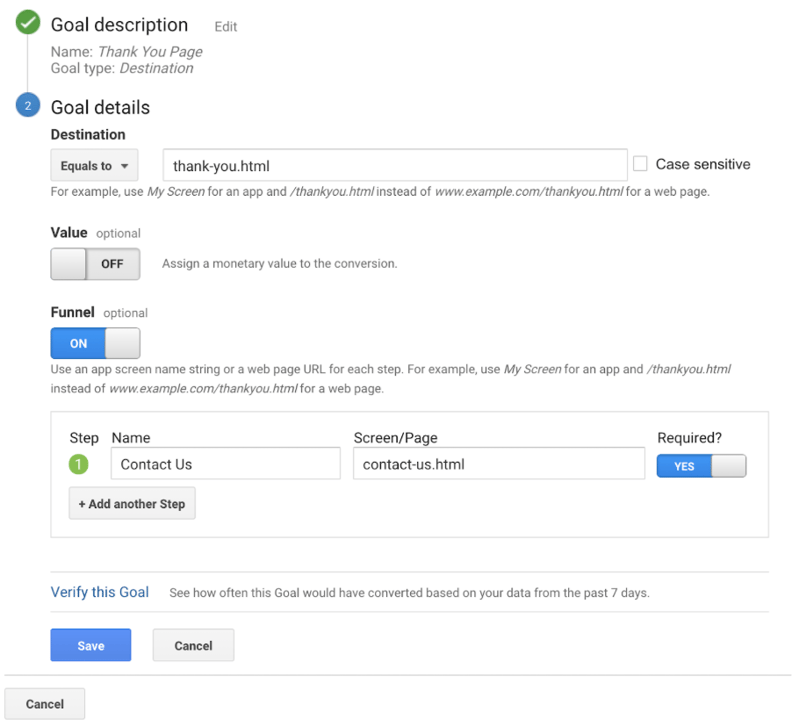
The funnel option is good to use when there are previous steps that need to happen before you can count your goal as completed.
For example, you can set it to where the user has to go to the page that the form is on and land on the thank you page for it to truly count as a goal.
If your user somehow ends up on your thank you page without filling out a form, then you don't want that to count as a goal.
Here's an example of how it would look if you have the Funnel option turned on:
You did it!
High five, you did it! You just created a goal in Google Analytics and you are on your way to better measure your conversion rate. Keep it up!
Want to learn even more about Goals and Conversions in Google Analytics?
Our on-demand video training course goes into detail about Goals and Conversions and all other important areas of Google Analytics that help you easily track your marketing success.
Click the button below to learn more and try your first lesson for free!